Why You Shouldn't Wear Tefillin with Wet Hair

By Terri

As part of her scribal apprenticeship, Ariela is learning how to repair tefillin. The only English word that exists for these ritual objects is phylacteries. And you guessed it, that's not English!* Jews are commanded to bind certain words of the Torah "on their arms and between their eyes." The traditional** way to fulfill this commandment is to write the specific words on teeny tiny parchments and put them into square rawhide boxes, which are then attached to leather straps. The straps are how the words are bound to one's arm and between one's eyes.*** And when I say square, it really means square. We make every edge flat and every corner a 90 degree angle. 

Rawhide being shaped into tefillin.  [Image shows large sheets of ivory colored rawhide with vague and then more precise box shaped protrusions in one end. In the front are unpainted tefillin boxes]

Rawhide being shaped into tefillin.  [Image shows large sheets of ivory colored rawhide with vague and then more precise box shaped protrusions in one end. In the front are unpainted tefillin boxes]

How do you transform rawhide into neat square boxes? You wet it and either mold it over a wooden block in the correct shape, or you put it into a special metal press which squishes the soaked rawhide into the correct shape. Tefillin are worn during morning prayer.**** If you're running late, that sometimes means that your hair doesn't have time to dry properly between getting out of the shower and donning your tefillin. What do you think happens when that same shaped rawhide is put on wet hair?


An example of healthy tefillin. [Image shows a very angular black tefilah***** for the arm. It is comprised of a cube on top of a stitched regtangular base, with black leather straps running through it.]

An example of healthy tefillin. [Image shows a very angular black tefilah***** for the arm. It is comprised of a cube on top of a stitched regtangular base, with black leather straps running through it.]

And so we present the visual essay of why leather boxes on wet hair is a supremely bad idea. 

Upright side view of a damaged tefilah shel rosh (the one for the head). The black paint is worn away in many places and the bottom is no longer flat - though it is resting on a cutting mat, the bottom layer of the base is actually curled.

Upright side view of a damaged tefilah shel rosh (the one for the head). The black paint is worn away in many places and the bottom is no longer flat - though it is resting on a cutting mat, the bottom layer of the base is actually curled.

Upside down front view of the same tefilah shel rosh. The bottom is so warped that it is almost entirely convex. In addition, much of the black paint is worn away.

Upside down front view of the same tefilah shel rosh. The bottom is so warped that it is almost entirely convex. In addition, much of the black paint is worn away.

These are sad tefillin. Please don't wear your tefillin on wet hair and makes yours sad like them. It won't happen instantly, but it will happen over time.

The good news is that this sort of problem can be fixed! You can take them to a scribe, or some other person who knows about both leatherworking and the laws of tefillin and they can re-mold them. However, this is not an excuse to be lax about drying your hair.

This is the same tefilah shel rosh pictured above after Ariela finished its rehab job.

Side view of the upright repaired tefilah shel rosh. The straps have been replaced and are now shiny, all of the tefilah is properly black, and the bottom is now resting flat on the cutting mat.

Side view of the upright repaired tefilah shel rosh. The straps have been replaced and are now shiny, all of the tefilah is properly black, and the bottom is now resting flat on the cutting mat.

Overhead view of the upside down repaired tefilah shel rosh. The bottom is now entirely flat, and the stitching holding the entire object together has been replaced.

Overhead view of the upside down repaired tefilah shel rosh. The bottom is now entirely flat, and the stitching holding the entire object together has been replaced.


*Though it pleases me to refer to a large workshop for making tefillin as a "phylactery factory." 

**The tradition in question is the rabbinic tradition.

***"Between your eyes" doesn't actually mean what it sounds like. The tefillin worn on the head are centered between the eyes, but the bottom edge should be flush with the hairline (or the original location of the hairline, if it has receded).

****Mostly. Tefillin are mostly worn during morning prayer. There are exceptions.

*****Tefilah is the singular of tefillin.

New Judaica Product - Mezuzah Parchments

Were you looking for the only place you could find a Spanish & Portuguese style mezuzah written by a woman? This would be it.

Image is a watermarked 12 cm mezuzah parchment in the Spanish & Portuguese style of ritual calligraphy.

Image is a watermarked 12 cm mezuzah parchment in the Spanish & Portuguese style of ritual calligraphy.

How it Came to Be:

You might think that a mezuzah parchment,* being small, would be the easiest of all of the ritual scribal objects. You would be wrong. The technical aspects and rules pertaining to the mezuzah make it actually quite difficult to write.

The first mezuzah size we will be offering is the largest size typically available - twelve centimeters (approximately five inches) tall. Since Terri thinks S&P ktab** is much fancier than Ashkenazi, we will not be offering a "mehudar" or "fancier calligraphy" option

The text on each parchment is scribed by hand by Ariela, and as such will differ slightly from the image. It may take up to 6 weeks for your mezuzah order to ship, depending on the volume of demand at the time. You may notice that the parchment in the image contains faint gray spots. Not every parchment will look like that, as not every parchment comes from a spotted cow.

Important Note: Ariela adheres to strict halachic*** standards when writing her mezuzot. However, not everyone accepts women as kosher scribes, and anyone who does not will not accept this scroll as kosher. If purchasing the scroll as a gift, please be certain to ascertain that the recipient accepts women as scribes.****


*That would be the bit that goes inside the fancy case you were given as a housewarming present.

**Style of calligraphy for ritual objects

***Jewish legal

****Information on women scribes courtesy of Hasoferet

Fun with Quill Grips Part III

by Ariela

Quill grips knitted by Terri

Quill grips knitted by Terri

Back in May I wrote about the discomfort I was experiencing as I started to write with a quill due to the shaft being narrower than was comfortable for me to grip. Terri knitted two quill grips for me to use, proving that she is a wonderful manager and best friend and sometimes just as inclined as I am to do weird stuff just because the idea is there.

Alas, I discovered I have a tendency to get ink on them. And when you get ink on yarn you are gripping firmly, it comes back out. Sometimes I just got it on my fingers, sometimes it dripped, and sometimes it gooshed out in truly unfortunate ways. No photographic evidence of this part exists, because whenever it happened I was occupied with grabbing for blotting rags rather than reaching for a camera. I refuse to attempt to recreate it for the interwebs - I have some dignity to maintain.

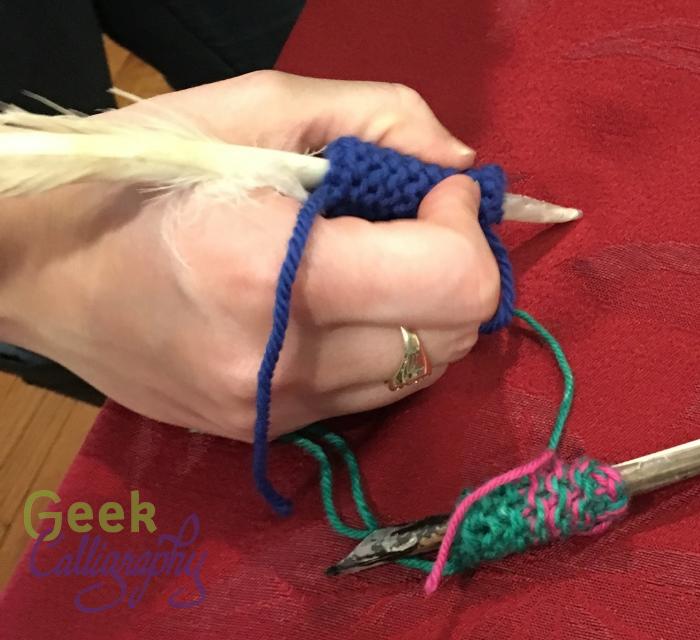
So I turned back to the Rainbow Loom grip that I made. It is significantly less comfy than Terri's knitted ones, but rubber bands have zero absorbance, so I just wiped it off whenever I got ink on it. It did not get quite as sweaty as I had feared it would, but the knobbiness got to be a problem if I wrote for more than an hour.

Around the same time that I was inspired to upgrade my nib organization, I was similarly inspired to look into solving the persistent irritant of my quill grip. I knew that what I really wanted was molding rubber, but that I also didn't want to deal with making a mold. Fortunately for me, other people have also had a similar desire, and some time spent googling around introduced me to Sugru.

I ordered some Sugru and after a number of delays I finally got it. Based on all the images and gifs I have seen of people putting it on wires and showing how bendy it is I assumed it would have a decent amount of squish to it after it cured. Between the formulation of that sentence and the photos of people using it to hang pots on the wall, you have probably guessed that this did not turn out to be the case. Yet somehow I failed to reason that out. So I wrapped the entire packet around it in an effort to increase the girth of the quill as much as possible to counteract the assumed squish. Turns out, Sugru is only bendy when small amounts are wrapped around other things that are bendy. When you wrap a chunk around something that doesn't have a heck of a lot of give to it, it's pretty solid.

The new quill grip made out of black Sugru. I chose black so that it won't show any staining from the ink.

The new quill grip made out of black Sugru. I chose black so that it won't show any staining from the ink.

I've been busy with other projects since I did this, so I haven't had a chance to test out the new grip for an extended period, which is always the proving ground. I may trim it down, or I may use another packet to make a narrower grip, perhaps with a bit more contouring, though I have never been a fan of those super-contoured pencil grips they make. But I think that Sugru is probably the solution I have been looking for.

Fun With Quill Grips - Rainbow Loom Edition

by Terri

While Ariela had both a Rainbow Loom and the bands to use with it back in Chicago, we decided that it would be best to contrast the knitted prototypes with a Rainbow Loom prototype. So I borrowed one from a family with 9 year olds and grabbed some bands at our favorite local kids store

After testing the quill cozies, we moved on to the Rainbow Loom. For those reading without medium* children, a Rainbow Loom (or its generic equivalent) is a device designed to hook small colored rubber bands together to make various objects. Generally these objects are bracelet-like, but apparently Ariela had found some instructions for making pencil grips on the internet and we went with it. 

Creating a grip over the quill. It's an interesting process.

Creating a grip over the quill. It's an interesting process.

I had assumed that the yarn venture would have been a lark, and the grippiness** of plastic would win out. The fact that yarn can absorb ink and plastic can't seemed to be another point in its favor. However, Ariela feels that the plastic one would end up getting very sweaty. And since she's the ultimate user of the product, her comfort is one of the most important factors. 

Testing... Testing... Good concept, but not right for the end user.

Testing... Testing... Good concept, but not right for the end user.

Next up will be seeing the revisions to the knitted prototype!


*7-10 years old is the target demographic. That age no longer qualifies as small, in my opinion.

**Technical term

Fun with Quill Grips - Yarn Edition

by Terri

Facebook can get both Ariela and me into a lot of trouble. To wit:

Ariela Housman:

Dear Chicago Facefriends with children. Would any of your kids be willing to let me use their Rainbow Loom for a 20 minute project? I will supply my own bands and happily let them have the extras in exchange.

(My quill is narrower than an average pencil and therefore kinda uncomfortable to hold for long periods. And also therefore too narrow for a store-bought pencil grip to be of any use. The interwebs informs me it is easy peasy to make a pencil grip with a Rainbow Loom. Hence asking.‪ #‎CalligrapherProblems‬)

Jen Taylor Friedman: Wow. I've always just sort of wadded up masking tape. Rainbow Loom is a MUCH better idea.
Ariela: The other suggestion the Interwebs furnished was foam roller curlers. Downside being that the foam squooshes lots. But I do have those on hand. I tried it. Works okay, but I am still interested in trying the rainbow loom trick with gel bands. I could color code my quills by size that way!
Ariela: Behold the silliness.
Quill shoved through the middle of a green foam hair curler
Jen: Heh. Yes that is Quite Silly.
Jen: You should get Terri Ash to knit you something.
Ariela: I'm not making Terri knit me a Quill Cozy.
Terri Ash: Quill cozies.... Hrm. I suppose the simplest method would be to knit a rectangle and seam it into a tube. Should it be ribbed for grippiness?
Ariela: Also, the elastic will help it both fit and grip better. And I want Terri to continue to like me, so asking her to knit with elastic is probably right out.
Jen: I think the problem is that the quill is so narrow that if you used yarn that was thick enough to make a good finger grip, you'd have like 3 stitches, and it wouldn't make a very good seam.
Ariela: Yah, that. Laceweight won't increase the diameter enough, and that's what you'd have to use.
Terri: You could do it width wise with 4 rows in DK or worsted, leaving the cast on edge live and graft the top to the bottom.
Jen: This is why it'd be a Terri-worthy challenge :)
Terri: Now I feel like I need to do this, just to prove it's doable
Jen: Terri blame me not Ariela
Ariela: Things you never thought would be part of your job description.
Terri:

Jen - I'm totally blaming you.

Ariela - I think it falls under the subset of artist-wrangling.

Ariela: One of these days we really will have to write out a list of responsibilities entailed in Artist Wrangling, if only for the entertainment value.
Terri: Mostly it involves a lot of "Ariela, NO"
Liz Shayne: Wouldn't the alternative be just knit an icord?
Terri: You could do that. I may have to try out a couple of options. After being told that it's about creating bulk though, I feel garter is what's called for, and that makes icord tricky.

At first I thought that it might be best to try making a small rectangle and seam it into a tube. But after Liz suggested I use i-cord, the wheels started turning. Ariela told me that it needed bulk, and garter stitch is the best way to get that. Garter stitch in the round is tricky, all the more so when you're making a teeny-tiny tube. But I hunted up some scrap yarn and the correct size needles and made a couple of samples. 

Leftover sock yarn held double

Leftover sock yarn held double

Random yarn sample (I *think* it's DK weight)

Random yarn sample (I *think* it's DK weight)

I started with the sample on the left, which is a self striping sock yarn held double knit on US size 7 needles. Even while knitting, I felt this one was very squooshy.* After testing, my assumptions were confirmed - it wasn't going to work. 

Testing,,, Testing... too squooshy

Testing,,, Testing... too squooshy

The second sample was some stiffer wool that I had lying around. I knit that one on US size 6 needles. According to Ariela, this one is actually usable**, but she has some requests for the next prototype. It needs to be one stitch narrower, and probably knit on yet smaller needles. I'm planning on doing another sample out of the blue wool with the proposed modifications, but we're well on the way to a standard pattern for a useable item. This is really cool, because it didn't exist a week ago and now it does.

Testing... Testing... Needs work, but much better.

Testing... Testing... Needs work, but much better.


Check back next week for the results of the Rainbow Loom experiments!


*Technical term

**You can tell this in the sample image - it has its ends woven in and everything

What’s the difference between a calligrapher and a scribe?

It’s true that in general English usage, there’s not much to choose between the words ‘calligrapher’ and ‘scribe.’ As with so many synonyms in English, the two derive from different languages of origin – Greek and Latin respectively, here – and they mean pretty much the same thing. When Jews say ‘scribe,’ though, we tend to mean one very specific thing: someone who knows the Jewish law pertaining to the writing of certain sacred texts and has the technical skill to write them. Each of these requirements can take years of study to meet.

Read More